Select Your User-type
Instructions differ for Clever and Non-Clever users. Please follow the appropriate instructions for your user type. Clients that use Clever for single sign on, follow the instructions in the Clever Users section. Clients that do not use Clever for single sign-on, follow the instructions in the Non-Clever Users section.
Clever Users
Clients that use Clever for single sign-on must enter and edit all course, teacher, and student data directly through Clever and should not follow the instructions in the Non-Clever Users section. Changes such as these should not be made directly in MI Write. Although it is possible to make such changes directly in MI Write, all changes will be lost after the next Clever-MI Write data sync which typically occurs once daily. Clever data will sync with MI Write according to the preset sharing rules that are established in Clever.
Non-Clever Users
MI Write Roster Import Instructions
1. Log in with your admin account.
2. Select the desired school, if applicable.
3. Scroll down to the bottom of the Courses tab and find the Roster section.
4. Click the Download button and download a copy of the blank roster template.
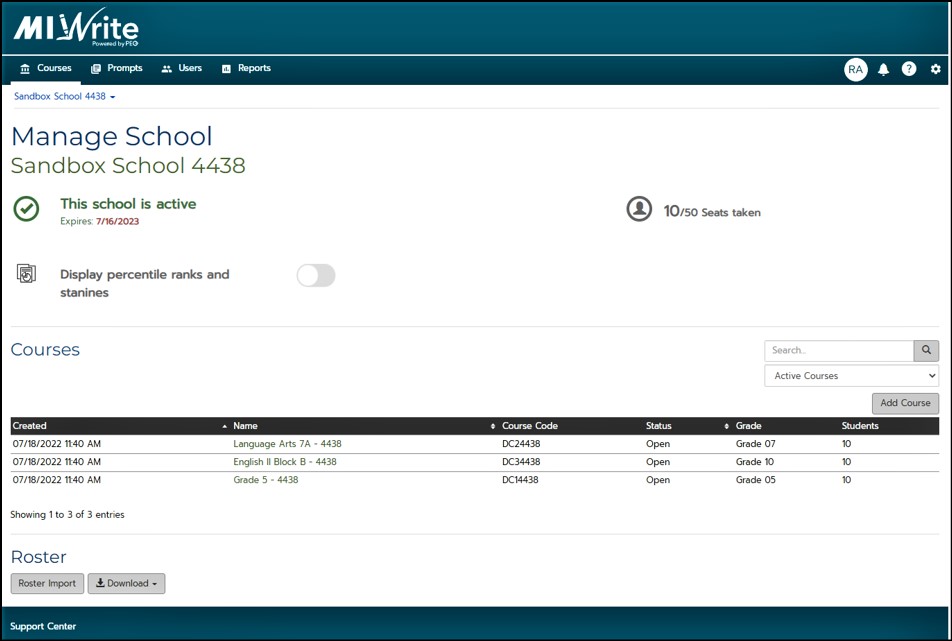
5. Follow steps 1 and 2 on the Instructions tab to complete the roster.
6. To save the completed roster and return to MI Write:
- On the Courses tab, scroll back down to the Roster section and click the Roster Import button.
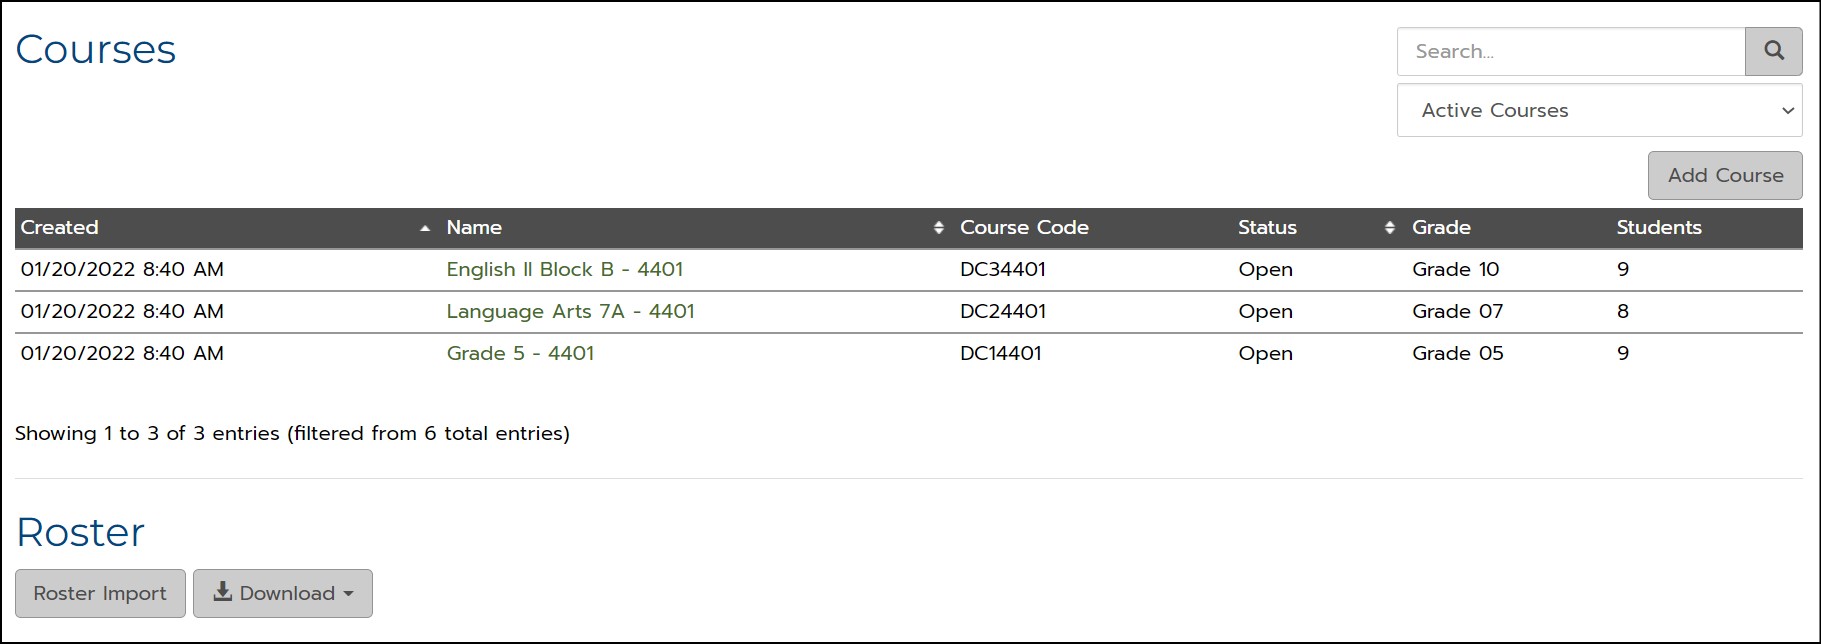
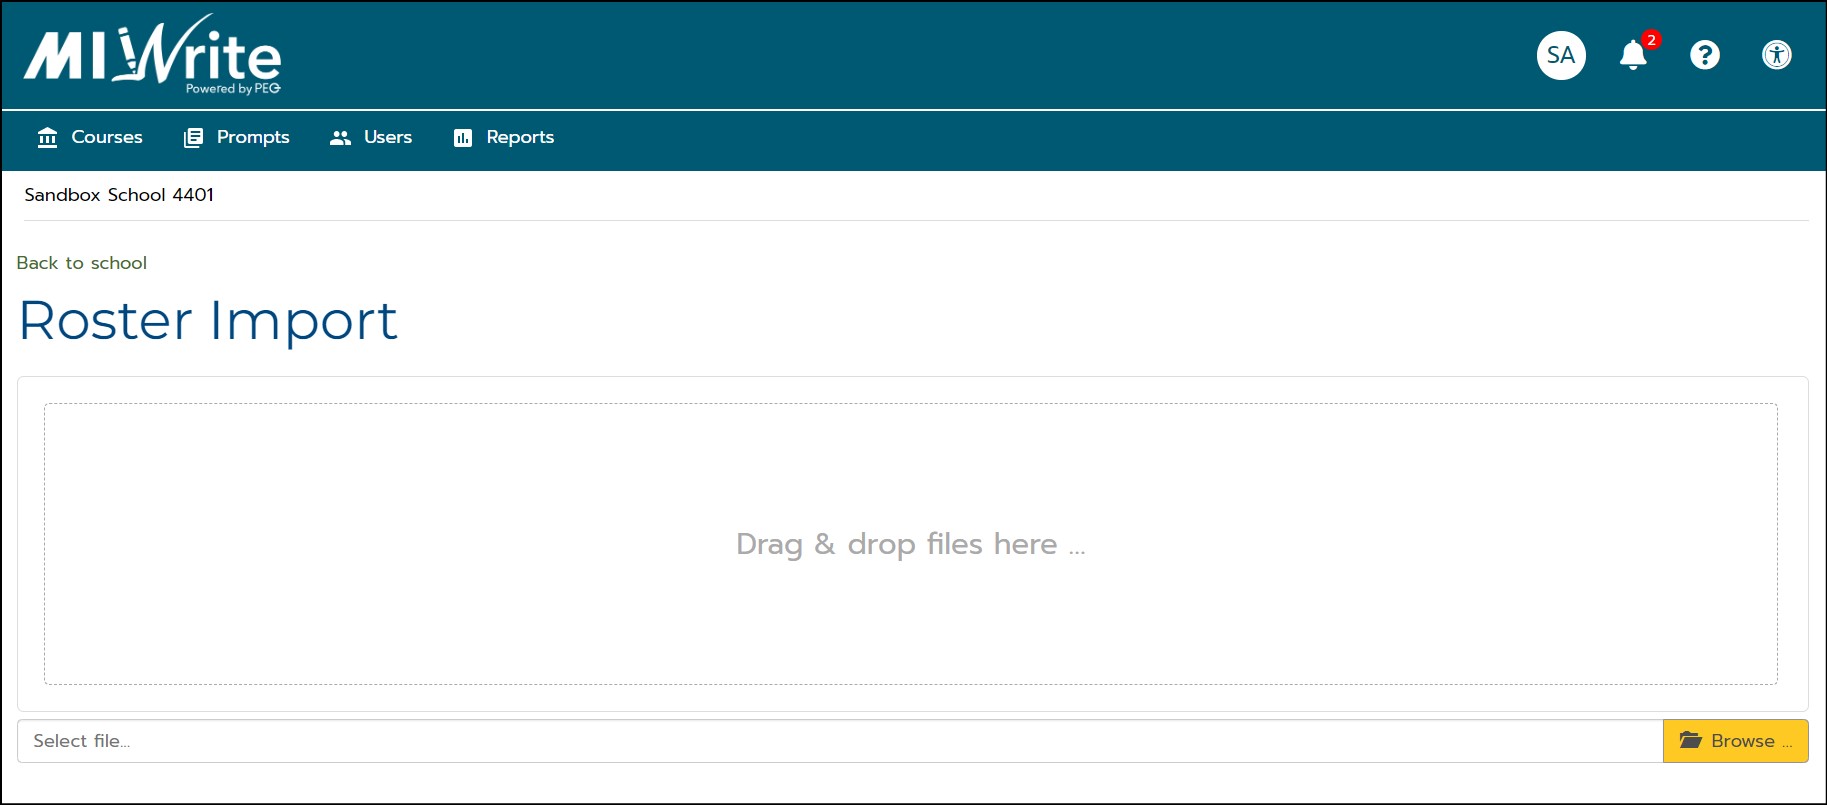
- Browse your files and insert the roster that was just completed. Then click Upload.
7. Review the Roster Analysis page to make sure that what is displayed accurately represents what you have filled out on the roster.
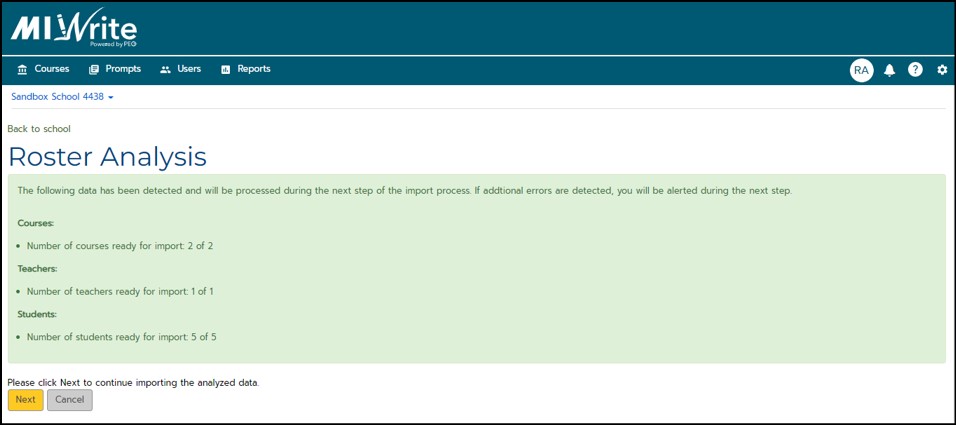
- If everything looks good, proceed with the import by clicking Next.
8. On the Roster Import Results page, if the matching student phase displays, you will need to select an option in each drop-down menu before proceeding. This will continue in increments of five students at a time until all potential matches have been addressed.
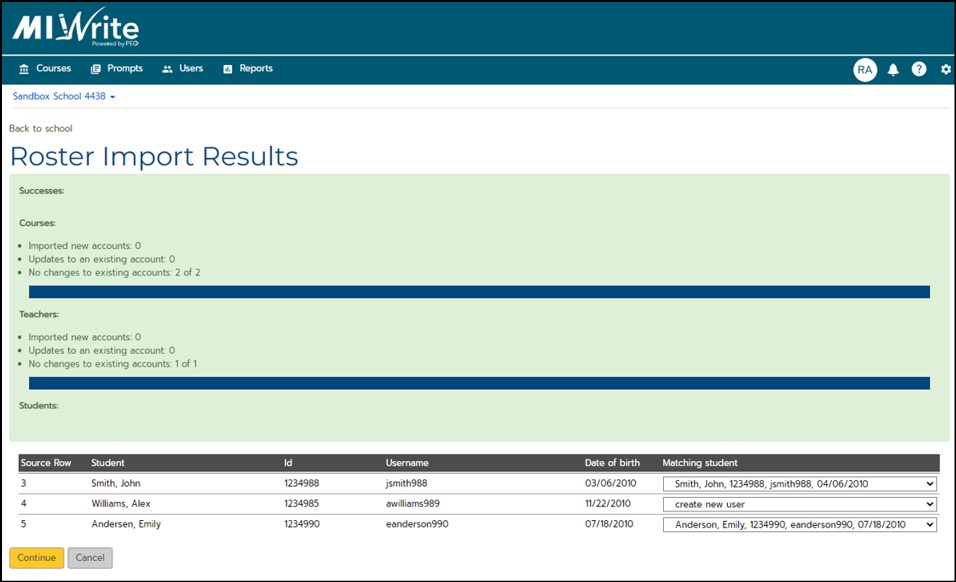
9. Once the import is complete, double check to make sure everything imported properly. If any errors occurred, they will also appear on the Roster Import Results page. Please address these issues and then import the corrected roster if necessary.
10. Once everything is complete, click the Close button or Back to school, and verify that the new seat total and courses list is accurate, if courses were created and students were added to them during the roster import process.
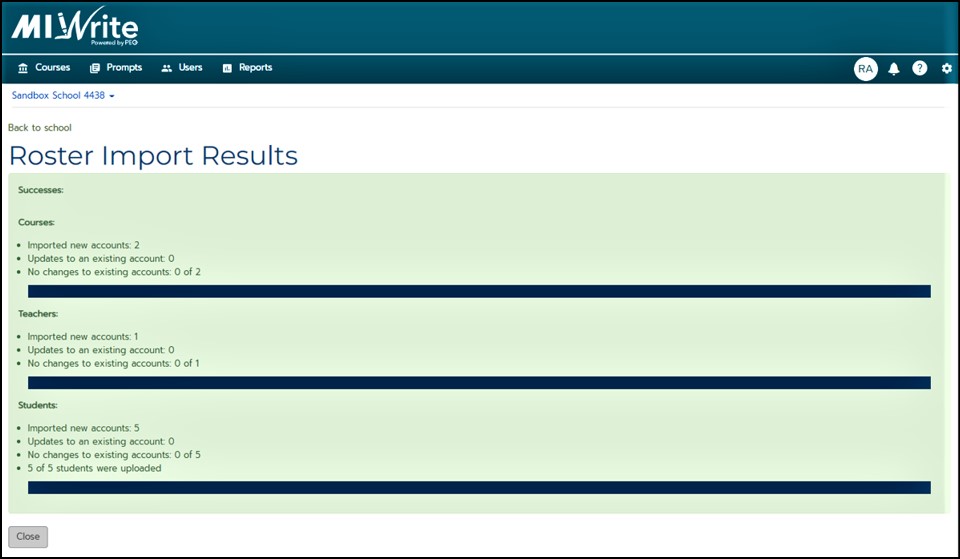
11. If no courses were imported by the roster, you will need to notify your teachers that they will need to create their own courses. They can create as many courses as needed and then add the corresponding students.
